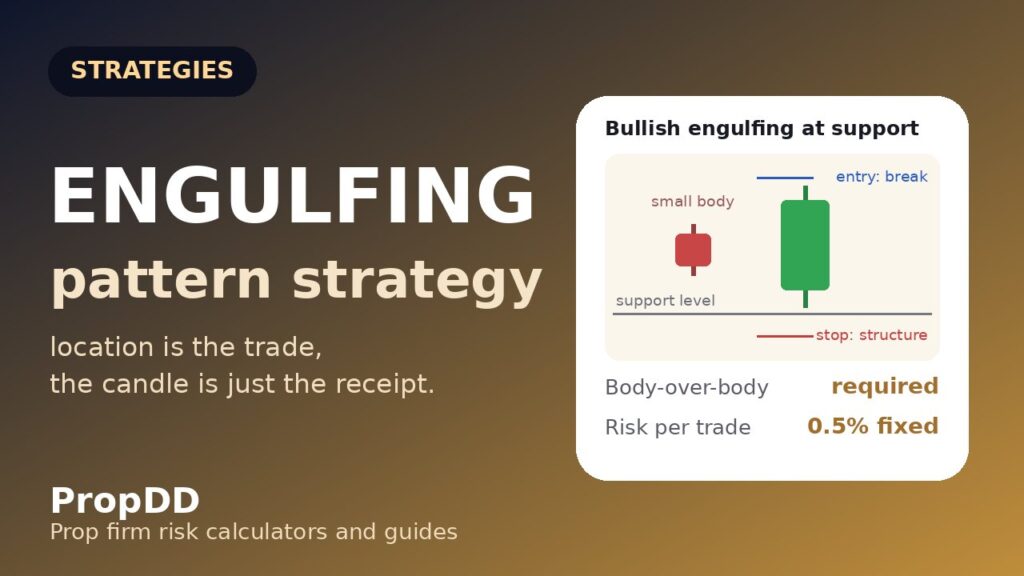
The ugliest engulfing candle I ever traded paid me $1,140, and the prettiest one cost me $880. Same week, same account — and that sentence contains the entire lesson. Monday’s candle was almost shy: a small red body on the H4, then a green body that swallowed it whole, closing near the high. I bought the break, risked my usual $500, and banked $1,140 at 2R. Thursday’s engulfing was magnificent — a towering green candle that gobbled a red one on GBPUSD, the kind that gets screenshotted in trading groups. I bought it mid-range with no level beneath it, price reversed into the stop, and I was $880 lighter by the close. The engulfing pattern does not fail funded traders. The location does. That week rewired how I trade this pattern on challenge and funded accounts, and the rewiring is what this guide is.
In this article
- What an Engulfing Pattern Actually Is (and the 3-Part Confirmation Test)
- My 6-Rule Engulfing Plan: Setup, Entry, Stop, Target, Filters
- Position-Sizing Maths Under a Daily Loss Limit
- Five Real Trades: My Trade-by-Trade Journal
- When Engulfing Patterns Fail (and How I Limit the Damage)
- Engulfing + Consistency Rules: How It Fits the Funded Account Model
- My Engulfing Routine: Timeframes, Sessions, Daily Checklist
- Engulfing Pattern FAQ for Prop Firm Traders
An engulfing pattern is a two-candle reversal formation: the second candle’s body completely covers the first candle’s body. Bullish engulfing — small red candle, then a larger green candle that swallows it — signals buyers have taken over. Bearish engulfing is the mirror. It is the most-read reversal pattern in retail trading, and on a prop firm account it earns its place for one reason: the pattern hands you a built-in invalidation line before you place the trade. The low of the bullish structure (or the high of the bearish one) is where the story dies. Funded accounts are not lost on bad entries — they are lost on vague invalidation and stops widened mid-trade. An engulfing candle gives you a stop you cannot argue with, provided you only trade it where the location earns it and size the trade to fit the candle.
What an Engulfing Pattern Actually Is (and the 3-Part Confirmation Test)
Strip away the romance and an engulfing pattern is a two-act transfer of power. Act one: the small candle shows the old side still in control. Act two: the other side arrives with overwhelming force, erasing the first candle’s entire body in one session. On a funded account I only trade engulfings that pass a three-part confirmation test, because everything else is a big candle wearing a costume:
| Test | My rule | Why it matters on a funded account |
|---|---|---|
| Body-over-body engulfing | The second candle’s BODY must fully cover the first candle’s body — open-to-close, both directions. Wicks may poke out; bodies may not | A “nearly engulfed” body is just a strong candle, not a transfer of power. Half-measures produce half the win rate |
| Conviction close | The engulfing candle must close in its outer third — near the high for bullish, near the low for bearish. A candle that engulfs then fades into a long opposite wick is exhaustion, not takeover | Weak closes reverse more often. On a 5% daily limit, I cannot afford to fade weak closes — the data never forgave it |
| Location | The pattern must form AT a marked level: horizontal support/resistance, a supply or demand zone, or a round number. Mid-range engulfings are not traded, no matter how pretty | This is the $880 lesson. The beautiful Thursday candle formed between two zones — nowhere. A transfer of power that happens nowhere transfers nothing |
One more filter before anything else: prior move. An engulfing reverses an existing push — a bullish engulfing after a clean move down into support, a bearish engulfing after a clean move up into resistance. An engulfing that forms sideways reverses nothing; it prints noise with confidence. Same location-first thinking as my pin bar reversal strategy: an engulfing candle at a level is rejected liquidity with a receipt. An engulfing candle mid-range is volatility with a costume.
My 6-Rule Engulfing Plan: Setup, Entry, Stop, Target, Filters
The complete plan, in the order I check it. Nothing is optional — the journal at the end shows the two trades where I skipped a rule and what each skip cost:
| Rule | The detail |
|---|---|
| 1. Timeframe | H4 or Daily only. M30 is fine as a trigger only if the H4 already shows the setup — never as a standalone signal. M15 and below print ten times the engulfings at one-tenth the reliability |
| 2. Location | The pattern must touch a level I marked BEFORE the candles formed: horizontal support/resistance, a supply/demand zone, or a round number (1.3500, 1.1000, $2,400 on gold). Mid-range = no trade, automatically |
| 3. Confirmation | Full body-over-body engulfing, conviction close in the outer third, and the engulfing candle’s range must be at least 1.5x the average range of the last 20 candles — a “takeover” that is smaller than normal candles is not a takeover |
| 4. Entry | Stop order 2 pips beyond the engulfing candle’s extreme (above the high for bullish, below the low for bearish) after the candle CLOSES. No market orders into a forming candle, no entries before the close — let the confirmation confirm |
| 5. Stop and target | Stop 5-10 pips beyond the structure low (bullish) or structure high (bearish) — the extreme of the two-candle formation is the invalidation. Target: 2R minimum, or the next opposing level, whichever is closer. Partials at 1R are allowed; the stop moves to breakeven after 1R, never before |
| 6. Filters | London or New York session only for the trigger; nothing within 30 minutes of a red-folder release; max 2 engulfing trades per day; SKIP the trade if the structure stop forces risk above 0.5% — the pattern does not get to renegotiate my risk plan |
Rule 3’s size clause is the filter most traders never add. An engulfing candle SMALLER than recent candles is a transfer of power that nobody attended. I measure the engulfing candle’s high-to-low against the average range of the previous 20 candles: under 1.5x, I mark the level and walk away. Since adding this filter in August, my skip rate went up and my win rate went up with it. On a funded account, the trades you skip are part of the strategy — they are the ones that would have eaten your daily limit.
Position-Sizing Maths Under a Daily Loss Limit
This is the section that actually keeps you funded. Engulfing stops are honest but wide: the full two-candle structure on H4 majors runs 50 to 90 pips, $10 to $18 on gold. The temptation is to shrink the stop so the trade “fits” your lot size. Do that and you no longer have an engulfing trade; you have a random entry with a candle story attached. My account frame: $100K challenge, 5% daily loss limit ($5,000), and my personal daily stop at $4,000, below the firm’s line. I risk 0.5% per trade — $500, fixed, never adjusted for “confidence”.
Position size (lots) = Risk $ / (Stop distance in pips x Pip value per lot)
Risk $ = Account x 0.005 (my fixed 0.5% rule — confidence does not change it)
Sanity check: $500 is 12.5% of my $4,000 personal daily stop. Two losing trades cost $1,000 — a quarter of the day’s budget — which is why rule 6 caps me at two engulfing trades per day. If one trade’s stop distance forces risk above $500, I skip the trade. The stop is the stop.
Here is what the maths looks like on real setups. I keep the firm’s max daily drawdown calculator open next to my journal for every one of these — the daily limit, not the trade, is the real risk manager:
| Setup | Structure stop | Pip value (1 lot) | Size for $500 risk | Verdict |
|---|---|---|---|---|
| EURUSD H4 bullish engulfing, 55-pip structure | 55 pips | $10 | 500 / (55 x 10) = 0.91 lots | Trade it — 0.91 lots, clean numbers |
| XAUUSD H4 bearish engulfing, $14 structure | $14 (140 pips at $1/pip/lot) | $100 | 500 / (14 x 100) = 0.36 lots | Trade it — 0.36 lots, wide stop respected |
| GBPJPY H4 bullish engulfing, 120-pip structure | 120 pips | ~$6.80 | 500 / (120 x 6.8) = 0.61 lots | Trade it — 0.61 lots; yen pairs eat spread, factor it in |
| US30 Daily bullish engulfing, 380-point structure | 380 points ($380/lot) | $1 | 500 / 380 = 1.32 lots | Trade it — indices move; the stop is honest, the size respects it |
Five Real Trades: My Trade-by-Trade Journal
These are my real September journal entries, numbers unedited — including the two where I broke rules. Every one of these was pre-checked against the daily drawdown calculator before entry; the two losers were not sizing failures, they were rule failures, which is exactly why the journal matters more than the P&L:
| Trade | Setup (all H4, at a marked level) | Entry / stop / target | Size / risk | Result | Lesson |
|---|---|---|---|---|---|
| 1 | EURUSD bullish engulfing into 1.0850 demand; engulfing candle 1.8x average range | Buy-stop 1.0882, stop 1.0827 (55 pips), target 1.0992 (2R) | 0.91 lots / $500 | +$1,140 (2.28R, exited at opposing level) | The ugly winner. Location + size filter did all the work |
| 2 | GBPUSD bearish engulfing, mid-range — NO level beneath it | Sell-stop 1.2694, stop 1.2754 (60 pips), target 1.2574 | 0.83 lots / $500 | −$500 (rule 2 skipped) | The pretty loser. Skipped location because the candle looked good — paid full price |
| 3 | XAUUSD bearish engulfing at $2,412 resistance; 2.1x average range | Sell-stop $2,403, stop $2,417 ($14), target $2,375 (2R) | 0.36 lots / $500 | +$1,000 (2R, partial at 1R, stop to breakeven) | Wide gold stop felt expensive; the sizing maths made it identical risk to trade 1 |
| 4 | USDCAD bullish engulfing at 1.3600, only 1.1x average range — under my size filter | Bought anyway at 1.3630, stop 1.3585 | 1.10 lots / $500 | −$380 (rule 3 skipped — exited early on chop) | Small candle, small conviction. The filter exists because of trades exactly like this |
| 5 | EURJPY bearish engulfing at 163.50 supply after a clean 4-day rally; 1.7x range | Sell-stop 162.90, stop 163.70 (80 pips), target 161.30 (2R) | 0.63 lots / $500 | +$1,000 (2R, reached in 9 hours) | Reversal after an extended move — the engulfing’s best habitat. Patience paid |
Net across the five: +$2,260 on $2,500 of risk deployed, with both losers carrying a “rule skipped” tag. My journal rule now: any trade missing a rule number in the journal column is not a strategy trade — it is an experiment, and experiments get demo-sized, not $500. I log every setup in my trading journal the same evening, because the pattern’s real edge is how legible its failures are.
When Engulfing Patterns Fail (and How I Limit the Damage)
Engulfings fail in predictable ways. Knowing the mode in advance turns a failed trade into a planned $500 loss instead of a $1,500 spiral:
| Failure mode | What it looks like | My defence |
|---|---|---|
| The chop engulfing | Big candle prints inside a sideways box, reverses nothing, then reverses back. Most common on M30 and during Asian session | Rule 1 (H4+ only) and rule 2 (level required). Chop candles fail the size filter too — boxes compress ranges below 1.5x average |
| The news spike | A red-folder release prints a giant engulfing on pure volatility; the “takeover” is algorithms, not sentiment. Reverses within hours | Rule 6: nothing within 30 minutes of red-folder news. I check this against my news trading rules every morning before marking levels |
| The fade close | Candle engulfs the body but closes mid-range with a long opposite wick — exhaustion disguised as takeover | The conviction-close clause: if the close is not in the outer third, the pattern did not confirm. No trade, no debate |
| The extended-move trap | Engulfing prints after a 6-day vertical move with no pullback — latecomers piling in, not a reversal | I want a clean prior move into a level. If the move into the level is already 3x the average daily range, the engulfing is suspect |
| The spread ambush | Stop orders placed 2 pips beyond the extreme get triggered by spread widening at session rollover, then price never follows through | No entries in the 30 minutes around the daily server rollover; on exotics and indices I widen the buffer to 3 pips and shrink size to match |
Engulfing + Consistency Rules: How It Fits the Funded Account Model
A strategy is only as good as its fit with the account’s rules. Engulfing patterns fit the funded model well for three reasons. First, the pattern is naturally selective: genuine at-level engulfings with the 1.5x size filter print two or three times a week on my watchlist, not twenty. That scarcity keeps my trade count low — exactly what the consistency rule rewards.
Second, fixed 0.5% risk with a 2R minimum target survives losing streaks. Run it through the risk of ruin calculator: at a 40% win rate with 2R targets, expectancy is +0.2R per trade. That is why rule 6’s two-trades-per-day cap exists: two losses is a bad day, not a breached day. Three losses is how bad days become breached days.
Third, the structure stop makes the pattern auditable. The candle either engulfed the body at the level or it did not — and my September journal proves I sometimes traded it when it did not. That auditability is what lets me improve instead of just feeling bad about it. It is the same location-first DNA as my trend pullback plan; reviewing them together shows me which market regime I am actually reading well.
My Engulfing Routine: Timeframes, Sessions, Daily Checklist
The routine that runs the strategy without me improvising — about fifteen minutes a day, deliberately boring:
| Step | When | What I do |
|---|---|---|
| 1. Mark levels | Before London open | Horizontal S/R, supply/demand zones and round numbers on H4/Daily for EURUSD, GBPUSD, XAUUSD, US30. Levels are marked before candles form — never after |
| 2. News check | Same time | Flag red-folder releases; any setup within 30 minutes of one is dead on arrival, no exceptions |
| 3. Scan H4 | London + New York sessions | Look only at marked levels. Engulfing at a level: run the 3-part confirmation test, check the 1.5x size filter, size the trade with the formula box above |
| 4. Place and walk away | After the H4 close | Stop order 2 pips beyond the extreme, structure stop, 2R target, 1R partial with stop to breakeven. Two trades max per day. Then the charts close — watching does not improve fills |
| 5. Journal | Evening | Log every setup — traded or skipped — with the rule number if skipped. Skips get reviewed monthly; they are the cheapest education in trading |
Engulfing Pattern FAQ for Prop Firm Traders
Does the engulfing pattern work on prop firm accounts?
It works as well as its location. In my journal, at-level engulfings with the size filter win far more often than mid-range ones — the pattern’s edge is rejected liquidity, and liquidity only rejects at levels. Trade it with fixed 0.5% risk, H4+ timeframes and a location requirement, and it fits the funded model cleanly.
Should I count wicks or bodies when judging an engulfing?
Bodies. The strict definition is body-over-body: the second candle’s real body must fully cover the first candle’s real body. Wicks can poke out either side — that is normal. What invalidates the pattern is a body that only “almost” covers the prior body. Near-engulfings are strong candles, not takeovers, and I do not trade them as engulfings.
What timeframe is best for engulfing patterns on a funded account?
H4 and Daily. Lower timeframes print engulfings constantly but most fail the location and size filters, and each failed trade costs the same $500 whether the candle was “reliable” or not. M30 can act as a trigger only when the H4 already shows the setup at a level. M15 and below are noise with confidence on a challenge account.
Where exactly do I place the stop loss on an engulfing trade?
Beyond the two-candle structure: below the structure low for a bullish engulfing, above the structure high for a bearish one, plus a 5-10 pip buffer. That extreme is the pattern’s invalidation — if price crosses it, the “takeover” story is dead and you want to be out. Never shrink the stop to fit your lot size; shrink the lot size to fit the stop.
How many engulfing trades can I take per day on a challenge?
Two, maximum — and that cap is about the daily loss limit, not the pattern. Two $500 losses cost a quarter of a $4,000 personal daily stop. A third trade after two losses is revenge trading with a strategy label on it.
What is the biggest mistake traders make with engulfing patterns?
Trading the candle instead of the location. A beautiful engulfing mid-range reverses nothing because there is nothing to reverse from. The pattern’s power comes from rejected liquidity at a level: support, resistance, a zone, a round number. No level, no trade. Second-biggest mistake is shrinking the stop; third is entering before the candle closes.
Risk note: this is an educational breakdown of one strategy, not financial advice. Engulfing patterns lose regularly — my own journal above shows two losses in five trades — and no pattern overrides a prop firm’s daily loss limit. Size every trade so that a full losing streak stays inside your personal daily stop, and never trade a pattern you have not journaled for at least a month on demo or a small account.



