A rectangle is the market going quiet: price bounces between a ceiling and a floor, touches both edges more than once, and builds up orders on both sides. Then it breaks — and the break is only tradeable if it holds. The rectangle breakout strategy guide covers the full six-rule filter; this calculator does the fiddly part for you. Feed it the box high and low, your retest entry and your buffer, and it returns the box height, your stop back inside the box, your exact lot size from your chosen risk, the 1.5R target and the measured-move target — and a TRADE IT or SKIP verdict with the reasons spelled out.
In this article
What the calculator works out
The maths mirrors the strategy’s own rules. The entry is your retest fill at the broken level — never a chase of the initial spike. The stop sits back inside the box, 10 to 15 pips beyond the broken level: for a long, below the box high; for a short, above the box low. If price closes back inside past that buffer, the break has failed and you are out — that is the whole point of a box stop, and it is why the calculator refuses a retest that is already back inside. Target 1 is pure R: 1.5 times the stop distance, where the strategy closes half. Target 2 is the measured move — the full box height projected from the breakout point — which is the box itself telling you how far the expansion should run. If the measured move falls short of 1.5R, think twice before holding for the runner.
Worked example: buying a rectangle breakout on EURUSD
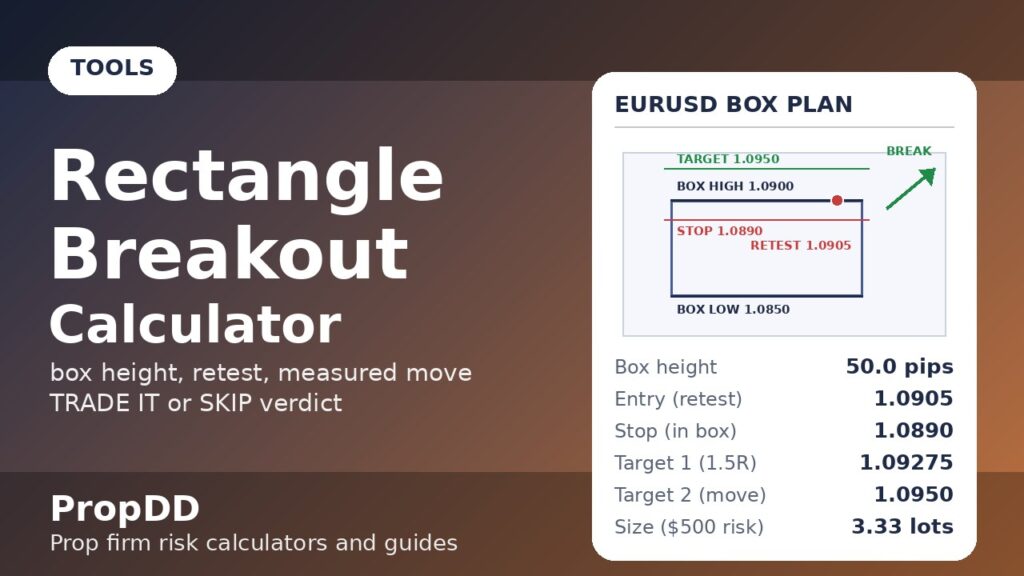
Defaults loaded in the widget above, so you can press Calculate and follow along. EURUSD consolidates between 1.0850 and 1.0900 (a 50-pip box), breaks above the high, retests at 1.0905, buffer 10 pips, $100,000 account risking 0.5% with a $2,500 personal daily stop:
| Output | Value | How it was computed |
|---|---|---|
| Box height | 50.0 pips | (1.0900 − 1.0850) ÷ 0.0001 |
| Entry | 1.0905 | Retest price — your entry fill |
| Stop | 1.0890 | Broken level 1.0900 − 0.0010 buffer, back inside the box |
| Stop distance | 15.0 pips | |1.0905 − 1.0890| ÷ 0.0001 |
| Risk | $500 | $100,000 × 0.5% |
| Position size | 3.33 lots | $500 ÷ (15.0 × $10) |
| Target 1 (1.5R) | 1.09275 | 1.0905 + 1.5 × 0.0015 |
| Target 2 (measured move) | 1.0950 | Breakout point 1.0900 + 0.0050 box height — clears the 1.5R target, so the runner has room |
| Verdict | TRADE IT | 15-pip stop is 0.14% of entry, $500 well under the $2,500 daily stop, retest only 5 pips past the level (half the box is 25) |
Sizing grid at $500 risk
Same $100,000 account at 0.5% risk, $10 pip value — how the lot size moves as the stop distance changes:
| Stop distance | Lots |
|---|---|
| 10 pips | 5.00 |
| 15 pips | 3.33 |
| 20 pips | 2.50 |
| 25 pips | 2.00 |
| 30 pips | 1.67 |
When the calculator says SKIP
The verdict is the part that protects a funded account. It refuses the trade — with the exact reason — when any of these fire:
| Gate | Rule | Why it exists |
|---|---|---|
| Failed back inside | Retest already past the broken level + buffer on the wrong side → SKIP | A break that closes back inside is not a break any more — the thesis is dead, not discounted |
| Chased break | Retest more than half the box height past the broken level → SKIP | Buying after half the measured move is already spent leaves no room for the target |
| Box too small | Box under 25 pips tall → SKIP | A 25-pip measured move is one spread spike plus one normal wick away from a stopped-out trade |
| Oversized pattern | Stop wider than 1% of entry → SKIP | On a $100k account a 1% stop forces either tiny size or real daily-stop danger |
| Daily-stop breach | Risk above your personal daily stop → SKIP | One trade must never be able to end your day on its own |
| Dust size | Lots under 0.01 → SKIP | If the maths says 0.004 lots, the pattern does not fit this account — move on |
How this fits prop firm rules
Rectangle breakouts are a natural funded-account pattern for one reason: the stop has a structural home — just back inside the box — instead of a round-number guess. That keeps stop distances tight, which keeps lot sizes honest under your personal daily stop. Two disciplines from the strategy guide matter more than the calculator itself: never chase a break that runs without a retest (a missed trade costs nothing, a chased one pays spread at the worst moment), and only take breakouts that complete during London or New York hours — a box that breaks in thin hours is the classic fakeout factory. Size every retest through this calculator, not by feel — feel is how traders turn a clean 15-pip box stop into a 150-pip hold-and-hope.
Frequently asked questions
What counts as a real rectangle?
Both edges tested more than once by real buyers and sellers — not two random highs and two random lows. The full three-measurement box test is in the rectangle breakout strategy guide.
How is this different from the Asian range breakout calculator?
The Asian range breakout calculator works on a clock-session box — 00:00 to 07:00 GMT, validated at 18 to 60 pips — with a fixed 5-pip-beyond-edge stop and a single fixed 1.5R target. This calculator works on any consolidation rectangle on any timeframe, takes your own buffer, and prices the measured move (full box height) as the second target. Session box versus pattern box: different inputs, different targets.
How is this different from the London breakout calculator?
The London breakout calculator also breaks a session box, but it enters on the breakout itself (edge plus buffer, no retest) and stops at the opposite edge of the box, with R-multiple targets only. This calculator waits for the retest, stops just back inside the broken edge, and adds the measured-move target.
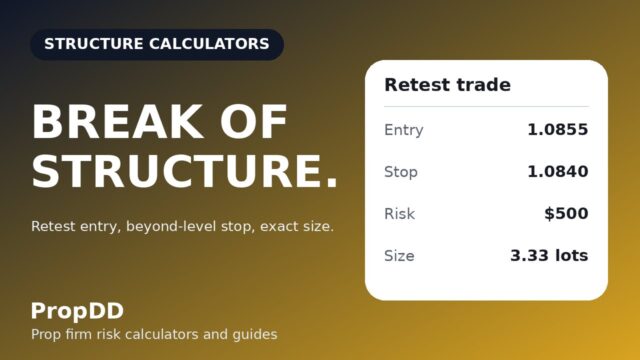
How is this different from the break of structure calculator?
The break of structure calculator breaks a single swing level and projects the prior swing range as its measured move. This calculator breaks a two-edge consolidation box and projects the box height. Same break-and-retest family, different structure, different inputs, different measured move.
What if price never retests the broken level?
Then there is no trade under the strategy’s rules — unless a buy stop just above the breakout candle’s high triggers within three candles. Chasing a break that has already run half the box height is a different strategy with worse R-multiples and fills at the moment of maximum emotion. Let it go; the calculator only prices the retest.
Can I use this on gold or indices?
Yes — switch the pip-size selector to 1 for XAUUSD or 0.1 for indices and enter prices in the instrument’s own units. The 1% stop-width gate still applies, so on volatile instruments a 10-point buffer may need raising before the maths looks sane.
Risk note: a break that closes back inside the box past your buffer invalidates the setup — if price closes back inside, the trade is over, whatever the calculator said at entry. Nothing here is financial advice. Demo every new setting for two weeks before it touches a funded account.