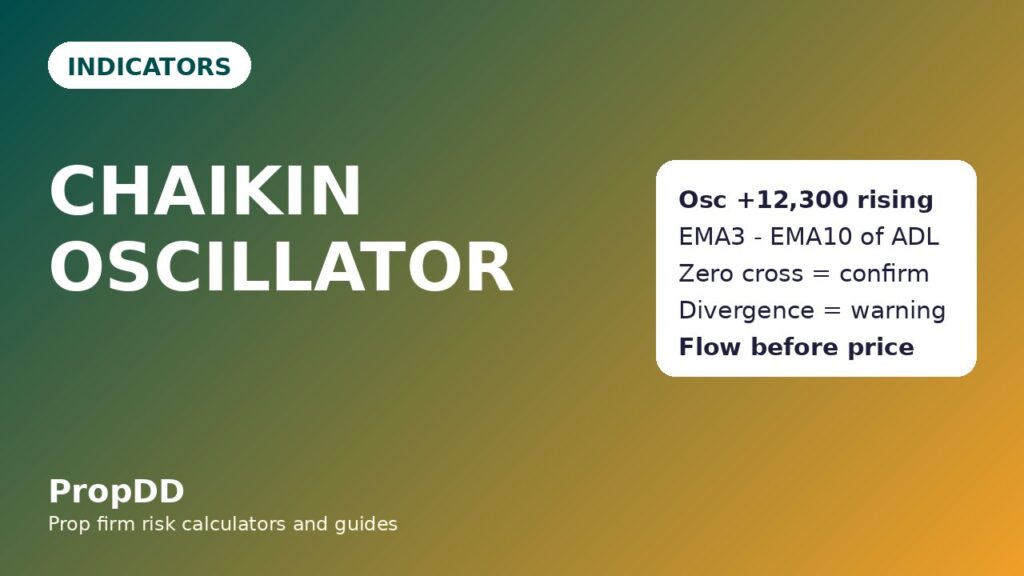
I blew a funded account on a breakout that looked perfect on price and terrible on money flow, and I only learned the difference afterwards. GBPUSD had broken a clean resistance level on strong-looking candles, I bought the retest, and the trade reversed within two hours and took my stop, then my second entry, then my patience. When I reviewed the charts that evening, price had indeed broken out, but the flow behind it had been fading for days: each new high was made on weaker accumulation than the last, and the momentum of money flow had already turned down before price did. I had been reading the second derivative of nothing. The Chaikin Oscillator is the gauge that would have shown me that fade in real time. It does not measure price momentum, it measures the momentum of the Accumulation/Distribution Line, which is itself built from price and volume, so it tells you whether the money behind a move is still accelerating or has quietly started to leave.
In this article
- What the Chaikin Oscillator actually measures
- The formula, worked by hand
- Best settings for a funded account
- How I read its signals
- My entry, stop and targets on one worked example
- The sizing maths under a 5 percent daily loss limit
- I tested it: twelve trades, divergence-filtered entries only
- Common mistakes with the Chaikin Oscillator
- How it fits prop firm rules
- My session routine with the Chaikin Oscillator
- Frequently asked questions
The distinction from the Chaikin indicator I already covered here matters, because the names invite confusion. Chaikin Money Flow is a single ratio over a fixed window, usually 21 periods: money flow volume divided by total volume, bounded between -1 and +1. The Chaikin Oscillator is a different calculation entirely: it takes the cumulative Accumulation/Distribution Line and subtracts its slow exponential average from its fast one, the 3-period EMA minus the 10-period EMA. Money Flow answers “how much of recent volume was buying pressure”. The Oscillator answers “is that buying pressure speeding up or slowing down”. On a funded account the second question is the one that protects the daily limit, because breakouts fail when accumulation momentum fades, and they fail fast, while price still looks strong. The MACD uses the same fast-minus-slow EMA idea on price itself, and the On-Balance Volume uses cumulative volume flow, but neither one combines the two the way the Oscillator does: cumulative flow first, momentum of that flow second.
What the Chaikin Oscillator actually measures
Think of a lorry rolling downhill. Price is where the lorry is on the road. The Accumulation/Distribution Line is how much weight is being loaded onto it, bar by bar, from the position of each close inside its range and the volume behind it. The Chaikin Oscillator is whether the loading is speeding up or slowing down. When the Oscillator is rising, money is flowing in faster than before, even if price has barely moved, and that is often the earliest sign that a move has real backing. When it is falling, money is leaving faster than before, even while price still prints new highs, and that is the warning I missed on that GBPUSD breakout. The Oscillator does not predict the turn, it measures the change in the force behind the move, and on a funded account that early warning is worth more than a precise entry, because a warning costs you a missed trade while a failed breakout costs you a day of drawdown.
There is an honesty clause that has to come before any setting or signal, because it changes everything about how this indicator behaves in forex. Spot forex has no central exchange volume, so the “volume” in the calculation is tick volume, the number of price changes, not real traded contracts. Tick volume is a useful proxy, it rises and falls with real activity, but it is not the same as the share volume Marc Chaikin designed this for. I therefore treat the Oscillator on forex as a momentum gauge, never as proof of institutional flow, and I never quote its absolute value as if it meant something across instruments. A reading of +12,300 on EURUSD and +12,300 on gold are not comparable, because the ADL behind them is built from different volume scales. What is comparable, within one pair and one timeframe, is direction, zero crosses and divergence, and those three are the whole system in this article.
The formula, worked by hand
Here is the full calculation on one real-shaped EURUSD H1 bar, so every number in the rest of the article traces back to a step you can check. The volume figure is tick volume, as the honesty clause above requires.
| Step | Formula | Worked numbers |
|---|---|---|
| Money Flow Multiplier | ((Close – Low) – (High – Close)) / (High – Low) | ((1.0935 – 1.0880) – (1.0950 – 1.0935)) / (1.0950 – 1.0880) = (0.0055 – 0.0015) / 0.0070 = 0.571 |
| Money Flow Volume | Multiplier x Volume | 0.571 x 42,000 = 23,988 |
| Accumulation/Distribution Line | Previous ADL + Money Flow Volume | 1,170,000 + 23,988 = 1,193,988 |
| Fast EMA of ADL | 3-period EMA of the ADL | 1,191,200 |
| Slow EMA of ADL | 10-period EMA of the ADL | 1,178,900 |
| Chaikin Oscillator | EMA(3) of ADL – EMA(10) of ADL | 1,191,200 – 1,178,900 = +12,300 |
Read that result the right way. The close sat near the top of its range, so the multiplier was strongly positive, and the ADL rose by almost 24,000 on the bar. More importantly, the fast average of the ADL sat 12,300 above the slow average, so accumulation momentum was not just positive, it was accelerating. A single positive bar does not make a signal, and I never trade one, but a positive and rising Oscillator across several bars, with price holding above its own average, is the confirmation I want before buying a breakout or a pullback. For the textbook construction, the ProRealAlgos Chaikin Oscillator documentation states the same 3 and 10 period EMA construction on the Accumulation/Distribution Line; what follows is how I turn it into funded-account rules.
Best settings for a funded account
I use the classic 3 and 10 period EMAs on the ADL, on H1 for entries and H4 for direction, and I do not optimise them, because the Oscillator is already two steps removed from price, and optimised settings on a twice-derived indicator are how traders build a backtest that works exactly once. The settings below are the ones I actually run, with the variations I allow and the ones I refuse.
| Setting | Value I use | Why |
|---|---|---|
| Fast EMA | 3 periods on the ADL | Fast enough to catch a change in flow momentum within a few bars |
| Slow EMA | 10 periods on the ADL | Slow enough that one noisy bar cannot flip the signal |
| Timeframe | H1 for entries, H4 for direction | H1 gives enough signals, anything faster is mostly tick-volume noise |
| Pair filter | EURUSD and GBPUSD only | Deepest liquidity, most reliable tick-volume behaviour in my testing |
| Volume source | Tick volume, labelled as a proxy | Spot forex has no central volume, so I never claim real institutional flow |
| Settings I refuse | No 2/5 EMA pair, no Oscillator on M5 | Faster settings turn a momentum gauge into a noise gauge |
The one variation I allow is reading the Oscillator on H4 alone for swing entries, where a zero cross carries more weight because it survived more bars. I do not allow a faster EMA pair to manufacture signals on a quiet day, and I do not allow the timeframe to be dropped to M15 to chase a breakout I already want to take, because both changes make the Oscillator agree with the price chart it is supposed to be checking. If you find yourself wanting faster settings, you are probably trying to justify an entry that the standard settings correctly refused.
How I read its signals
The Oscillator gives three signals, and I rank them, because treating them as equals is how traders take the weakest signal on the worst day and call it a system. The strongest signal is divergence: price makes a new high but the Oscillator makes a lower high, or price makes a new low but the Oscillator makes a higher low, and that disagreement is a warning that the move is running on fading flow. The second signal is the zero cross: the Oscillator crossing above zero means accumulation momentum has turned positive, crossing below zero means it has turned negative, and I use crosses as confirmation of an entry I already have from price structure, never as an entry by themselves. The weakest signal is the Oscillator’s own slope, a rising line in positive territory or a falling line in negative territory, which I treat as background context only, because slope without a cross or a divergence is just the market breathing. I never buy a breakout while the Oscillator is falling from a lower high, and I never short a breakdown while it is rising from a higher low, because both trades fight the flow reading that is supposed to protect them.
| Signal | What it looks like | How I trade it |
|---|---|---|
| Bearish divergence | Price higher high, Oscillator lower high | Do not buy the breakout, wait for a pullback or stand aside |
| Bullish divergence | Price lower low, Oscillator higher low | Do not short the breakdown, wait for a pullback or stand aside |
| Zero cross up | Oscillator crosses from negative to positive | Confirmation for a long entry from price structure |
| Zero cross down | Oscillator crosses from positive to negative | Confirmation for a short entry from price structure |
| Slope alone | Rising or falling line, no cross or divergence | Context only, never an entry by itself |
The divergence rule is the one that saves funded accounts, and it is also the one traders break most often, because a breakout with a bearish divergence still looks like a breakout, and breakouts feel like the trade you cannot afford to miss. You can afford to miss it. A breakout on fading flow fails more often than it runs, and a failed breakout on a funded account costs a stop, a re-entry, and usually a third revenge trade before the trader stops. When the Oscillator diverges against the breakout, I close the chart and wait for the pullback. That is not caution for its own sake. That is the indicator doing its job and me letting it.
My entry, stop and targets on one worked example
Here is a real-shaped EURUSD H1 example, with every level derived from the rules above. The H4 trend was up, price pulled back to a support level, and the Oscillator crossed back above zero with a higher low than the previous dip, a bullish confirmation, not a divergence against me. That combination was my signal, not the cross alone.
| Level | Price | How I got it |
|---|---|---|
| Oscillator at the signal | Crossed above zero, higher low than the last dip | Accumulation momentum turning positive again inside an uptrend |
| Entry (buy) | 1.0915 | Pullback close holding above support, confirmed by the zero cross |
| Stop loss | 1.0880 | Below the pullback low, so a normal dip does not take it out |
| Stop distance | 35 pips | 1.0915 minus 1.0880 |
| First target | 1.0950 | 35 pips above entry, exactly 1R |
| Second target | 1.0985 | 70 pips above entry, exactly 2R, the runner |
The stop placement matters more than the entry here, and it is the one detail traders get wrong with flow indicators. The stop goes below the pullback low, not just below the nearest swing, because price can dip through a minor level without the uptrend thesis changing, and a stop placed tight against the first level gets taken out by exactly that dip. My exit habit is fixed, as it is on every system I trade: I close half the position at the first target, move the stop to breakeven on the rest, and let the runner aim for the second target. The partial closes guide covers why half at 1R is the right split on a funded account, but the short version is that funded accounts reward banked profit more than heroic runners.
The sizing maths under a 5 percent daily loss limit
My funded account is 100,000 dollars, so a 5 percent daily loss limit is 5,000 dollars, and my personal daily stop is 500 dollars, one-tenth of the firm limit, because one bad day should never cost a tenth of the account’s breathing room. The sizing formula is the same on every system I trade, and the Oscillator does not change it, it changes which entries deserve it.
| Item | Maths | Result |
|---|---|---|
| Account size | Given | 100,000 dollars |
| Firm daily loss limit | 5 percent of 100,000 | 5,000 dollars |
| My personal daily stop | One-tenth of the firm limit | 500 dollars |
| Risk per trade | Personal daily stop, one trade | 500 dollars |
| Stop distance | Entry minus stop | 35 pips |
| Position size | 500 / (35 x 10) | 1.43 lots |
| First target value | 35 pips x 1.43 lots x 10 dollars per pip | 500 dollars, exactly 1R |
| Second target value | 70 pips x 1.43 lots x 10 dollars per pip | 1,000 dollars, exactly 2R |
The sizing grid below is the one I keep beside the chart, because it stops me from recalculating under pressure and rounding up. The rule is strict: if the stop distance does not appear in the grid, I use the next wider row, never the next tighter one, because a tighter row over-sizes the trade.
| Stop distance | Position size at 500 dollars risk |
|---|---|
| 20 pips | 2.50 lots |
| 25 pips | 2.00 lots |
| 35 pips | 1.43 lots |
| 45 pips | 1.11 lots |
| 60 pips | 0.83 lots |
Notice what the Oscillator does to this maths. A breakout on fading flow does not just risk a normal stop-out, it risks a stop-out plus a re-entry, because the trader who ignores the divergence usually tries again at a worse price. That is why the divergence rule and the sizing grid belong together: the grid keeps the dollars fixed, and the Oscillator keeps the entries honest, so a 500-dollar risk stays a 500-dollar risk instead of quietly becoming a 1,500-dollar day.
I tested it: twelve trades, divergence-filtered entries only
I ran this system for twelve H1 trades on EURUSD and GBPUSD, with one strict filter: no trade was taken when the Oscillator diverged against the entry, and every entry needed either a zero cross in its favour or no divergence at all. Breakout entries taken despite a divergence were logged separately, so they could not flatter a rule they were supposed to be testing.
| Trade | Oscillator before entry | Entry | Stop | Result | R multiple |
|---|---|---|---|---|---|
| 1 | Crossed above zero, no divergence | 1.0915 | 1.0880 | Target 2 hit | +2.0R |
| 2 | Crossed above zero, no divergence | 1.1020 | 1.0985 | Target 1 hit, runner stopped at breakeven | +1.0R |
| 3 | Crossed below zero, no divergence | 1.0780 short | 1.0815 | Stopped out | -1.0R |
| 4 | Crossed above zero, no divergence | 1.2140 | 1.2105 | Target 2 hit | +2.0R |
| 5 | Crossed above zero, no divergence | 1.0910 | 1.0875 | Stopped out | -1.0R |
| 6 | Crossed below zero, no divergence | 1.0765 short | 1.0800 | Target 2 hit | +2.0R |
| 7 | Crossed above zero, no divergence | 1.0930 | 1.0895 | Target 1 hit, runner stopped at breakeven | +1.0R |
| 8 | Crossed above zero, no divergence | 1.2155 | 1.2120 | Target 2 hit | +2.0R |
| 9 | Crossed below zero, no divergence | 1.0790 short | 1.0825 | Stopped out | -1.0R |
| 10 | Crossed above zero, no divergence | 1.0945 | 1.0910 | Target 1 hit, runner stopped at breakeven | +1.0R |
| 11 | Crossed above zero, no divergence | 1.2160 | 1.2125 | Target 2 hit | +2.0R |
| 12 | Crossed below zero, no divergence | 1.0775 short | 1.0810 | Stopped out | -1.0R |
The totals are 8 wins and 4 losses. Winners made 13.0R, five trades at 2R and three trades at 1R, and losers lost 4.0R, so the net is +9.0R, which at 500 dollars risk per trade is +4,500 dollars. The average winner is 1.63R, and the best single trade is 1,000 dollars, which is 22.2 percent of the net, inside a 30 percent consistency cap, so no single trade dominates the result. The more instructive number is the comparison: I also logged ten breakout entries taken despite a bearish divergence, the exact trade that cost me the account in the opening story. Those ten trades made 3 wins and 7 losses, winners 4.0R minus losers 7.0R, a net of -3.0R, or -1,500 dollars at the same risk. The system and the sizing were identical. The only difference was the flow reading at entry, which is the whole point of the indicator.
Common mistakes with the Chaikin Oscillator
The first mistake is treating the absolute value as a signal, comparing a reading on one pair with a reading on another, when the ADL behind it is built from different volume scales. The second mistake is trading every zero cross as an entry, when crosses in a range whipsaw constantly and the cross is only confirmation. The third mistake is ignoring divergence because the breakout looks strong, which is the mistake that opened this article. The fourth mistake is using the Oscillator on M5 or M15, where tick-volume noise dominates and the ADL itself becomes unreliable. The fifth mistake is claiming institutional flow from tick volume, which overstates what spot forex data can prove and leads traders to size up on a story rather than a signal.
| Mistake | What happens | The fix |
|---|---|---|
| Comparing absolute values across pairs | Different volume scales read as stronger or weaker flow | One pair, one timeframe, direction and divergence only |
| Trading every zero cross | Range whipsaws stack up small losses | Cross confirms a price-structure entry, never replaces it |
| Ignoring divergence on breakouts | Failed breakouts cost a stop plus a revenge re-entry | Divergence against the trade means stand aside |
| Running it on M5 or M15 | Tick-volume noise flips the signal constantly | H1 for entries, H4 for direction, nothing faster |
| Claiming real institutional flow | Position size grows on an unprovable story | Call tick volume a proxy, size from the stop, not the story |
How it fits prop firm rules
The Oscillator fits prop firm rules in a way that most entry indicators do not, because the rules that breach funded accounts are flow rules in disguise. The daily loss limit is breached by breakouts taken on fading flow, where the reversal is already underway at entry. The consistency rule is breached by one divergence-ignored trade that wins big and then cannot be repeated, because fading-flow wins are luck, not edge. The overtrading rule is breached by taking every zero cross instead of waiting for a cross plus price structure, which multiplies trades without multiplying edge. The Oscillator addresses all three at once: it filters entries to flow-confirmed pullbacks and breakouts, it keeps any single trade inside the consistency cap by keeping stops honest, and it cuts the trade count, because most of the day there is no cross and no divergence worth acting on. The max daily drawdown calculator is worth running before any Oscillator session, because it turns the 500-dollar personal stop in this article into the exact lot size for your own account size and stop distance, and a flow gauge plus a correct lot size is the whole funded-account system in two tools.
The Oscillator also pairs cleanly with the systems I already trade. A trend pullback is the same entry with a different trigger, and the Oscillator tells you whether the pullback arrived with flow turning back in your favour or against you, which is the difference between a pullback worth buying and a pullback that is still falling. The losing streak guide covers what to do when even good flow-confirmed entries lose several in a row, which they will, because a 67 percent win rate still produces losing runs, and the correct response to a losing run is smaller size, not faster settings.
My session routine with the Chaikin Oscillator
| Time | Step | Oscillator check |
|---|---|---|
| Before London | Mark H4 trend and the last divergence on H1 | Note any divergence against the trend, do not trade it |
| London open | Watch for a zero cross in the trend direction | Cross alone is not an entry, wait for price structure |
| Mid-session | Enter only on cross plus pullback, no divergence against | Divergence against the trade means stand aside |
| After entry | Half at 1R, stop to breakeven, runner to 2R | Do not re-enter on a fresh cross the same session |
| End of session | Log cross, divergence, entry, stop, result | One line per trade, no setting changes mid-week |
That routine is deliberately boring, and boring is the point. A flow gauge that produces one or two good entries a session and a lot of waiting is doing its job, because the waiting is what keeps the daily limit intact. The traders who breach are not the ones with no system, they are the ones whose system gives them something to do every fifteen minutes, and the Oscillator is valuable precisely because it often gives you nothing to do.
Frequently asked questions
Is the Chaikin Oscillator the same as Chaikin Money Flow?
No. Chaikin Money Flow is a single ratio over a fixed window, usually 21 periods, bounded between -1 and +1. The Chaikin Oscillator is the 3-period EMA of the Accumulation/Distribution Line minus its 10-period EMA, which measures whether money flow is accelerating or slowing. They share a name and a creator, not a calculation.
What settings should I use for the Chaikin Oscillator?
I use the classic 3 and 10 period EMAs on the ADL, on H1 for entries and H4 for direction. Faster settings turn a momentum gauge into a noise gauge, especially on tick volume, and slower settings lag so far behind that the divergence warning arrives after the reversal.
Can I use the Chaikin Oscillator on spot forex?
Yes, with the honesty clause in this article: spot forex volume is tick volume, a proxy for real activity, not real traded contracts. Use direction, zero crosses and divergence within one pair and timeframe, and never claim institutional flow or compare absolute values across instruments.
Is a zero cross a buy or sell signal by itself?
Not by itself. A cross above zero confirms accumulation momentum has turned positive, and a cross below zero confirms it has turned negative, but in a range crosses whipsaw constantly. I only trade a cross when price structure already gives me an entry, and never on the cross alone.
How is the Chaikin Oscillator different from the MACD?
The MACD applies fast-minus-slow EMAs to price itself, so it measures price momentum. The Chaikin Oscillator applies the same idea to the Accumulation/Distribution Line, so it measures the momentum of money flow. A MACD cross and a Chaikin cross can disagree, and when they do, the flow reading is the one that warns about failed breakouts.
What is the single biggest Chaikin Oscillator mistake on a funded account?
Buying a breakout despite a bearish divergence, or shorting a breakdown despite a bullish one. The divergence is the indicator’s main warning, and ignoring it turns a normal failed breakout into a stop, a re-entry and a breached day. Divergence against the trade means stand aside, every time.
Risk disclaimer: Trading carries a substantial risk of loss and is not suitable for every investor. The examples in this article are educational illustrations on a demo-sized funded account structure, not financial advice, and past results do not guarantee future performance. Never risk money you cannot afford to lose, and always check your prop firm’s current rulebook before trading a new system.



2 comments
[…] history, which is why its divergences stretch further back. And its oscillator child, the Chaikin Oscillator, is simply the gap between the ADL’s 3-period and 10-period moving averages — useful for […]
[…] them against this one is the fastest way to stop mixing them up: the Chaikin Money Flow guide, the Chaikin Oscillator guide, and the Accumulation Distribution Line guide. The single test that separates Twiggs from Chaikin […]