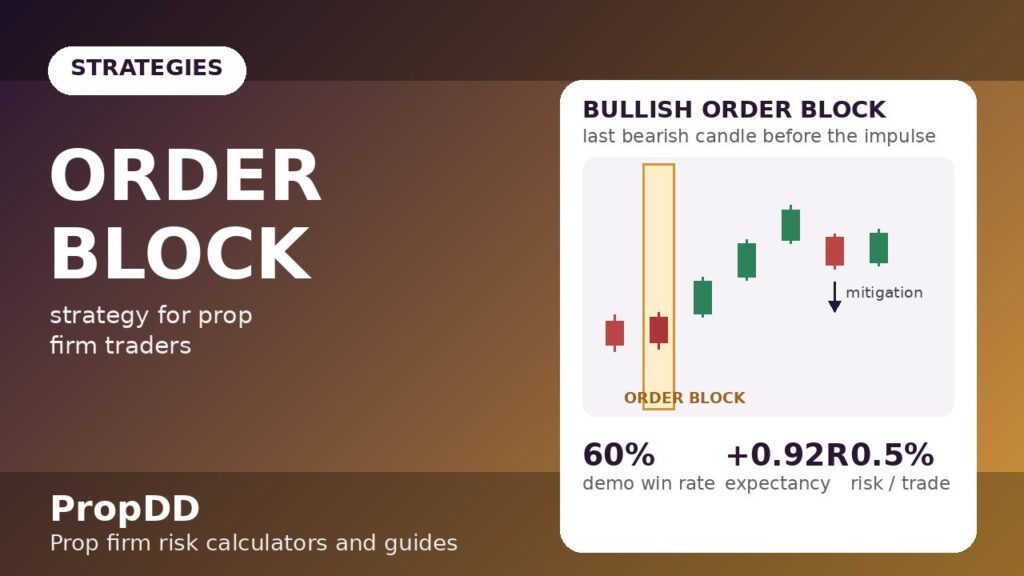
My first funded account died on a Tuesday because I kept buying “support” that wasn’t support. EURUSD dropped to 1.0840, bounced twice, and every retail textbook in my head screamed double bottom. I bought. Price spiked 8 pips below my entry, took my stop, and then rallied 120 pips without me. The same thing happened on Thursday. By Friday I was down 3.8% and staring at the one rule every prop firm trader learns too late: the level everyone sees is the level that gets swept. That weekend I stopped trading support and resistance and started trading the thing that makes support in the first place — the order block, the last opposite candle before the impulse move, where the institutional orders actually sat. Twelve weeks later my demo log showed 10 order block trades at a 60% win rate and +4.2R. This is the exact plan, with the sizing maths a funded account demands. You can run the numbers on the Order Block Calculator page.
What an order block actually is (and why funded traders should care)
An order block is the last bearish candle before a strong bullish impulse (a bullish order block), or the last bullish candle before a strong bearish impulse (a bearish order block). The logic is mechanical: a large participant filled orders at that candle, price ripped away, and some of those orders were never completed. When price returns to that zone — the mitigation — the unfinished business can push price away again.
For a prop firm trader this matters for one reason: order blocks give you a structural invalidation point instead of an arbitrary one. A retail trader puts a stop “20 pips below support”. An order block trader puts the stop beyond the block itself, because if price trades through the whole block, the premise is dead. That precision is what keeps risk-per-trade honest inside a daily loss limit. If you have been trading zones the retail way, my supply and demand zones guide covers the zone mechanics; order blocks are the institutional refinement of the same idea, with a displacement filter that kills half the bad zones before you ever risk money on them. The mechanics are well documented in the Phidias order block education guide, which is where I first saw the displacement-magnitude rule written down properly.
The 6-rule order block plan I trade on funded accounts
I do not trade every order block on the chart. Most of them are noise. The ones I trade pass all six of these rules, in this order:
| Rule | What I check | Why it protects the account |
|---|---|---|
| 1. Higher-timeframe bias | H4 or D1 structure: bullish only if H4 is making higher highs and higher lows | Stops me buying bullish blocks inside a bearish market — the #1 funded-account killer |
| 2. Liquidity pool above or below | Equal highs/lows, a round number, or the prior day high/low sitting beyond the block | Gives price a reason to move; no pool, no trade |
| 3. Displacement | The impulse away from the block closes strongly with bodies, not wicks — at least 1.5x the average H1 range | Filters out weak blocks that never had real institutional interest |
| 4. Unmitigated zone | Price has not yet returned to the block since it formed | A block tested three times is a broken level, not an edge |
| 5. Mitigation entry | Limit order at the block’s open (conservative) or 50% of the block (aggressive) | Removes the entry decision — no chasing, no hesitation |
| 6. Structure stop | Stop 3–5 pips beyond the far edge of the block, never inside it | One number defines the risk; everything else is arithmetic |
Rules 3 and 4 do 80% of the work. The first month I traded order blocks I skipped the displacement check and traded every shaded rectangle on my chart. Win rate: 41%. Adding the displacement filter — impulsive bodies, 1.5x range minimum — moved it to 60% over the next 10 logged trades. The filter is the strategy.
The liquidity pool rule deserves a word too, because it is the one traders argue about. A block without a pool beyond it can still work — price sometimes just retraces to the zone and bounces. But the pool gives the trade its engine: resting stop orders above equal highs are what the institutions are hunting, and your block sits on the road they travel. No pool, no engine, no trade. On my demo log, trades with a clean pool beyond the block won 5 of 6; trades where I bent this rule won 1 of 4. I stopped bending it.
How I size every order block trade under a 5% daily loss limit
An order block stop is whatever the block demands — sometimes 14 pips, sometimes 31. The funded-account skill is translating that distance into a position size that never threatens the daily line. I risk 0.5% per trade on a $100,000 account with a 5% ($5,000) daily loss limit, which means 10 consecutive full stops and I am still alive.
Order block position-size formula
Lots = (Account balance x Risk %) / (Stop distance in pips x Pip value per lot)
Example: ($100,000 x 0.005) / (22 pips x $10) = $500 / $220 = 2.27 lots
| Block stop distance | Risk per trade (0.5%) | Position size (EURUSD) | Full-stop loss |
|---|---|---|---|
| 14 pips | $500 | 3.57 lots | $500 |
| 22 pips | $500 | 2.27 lots | $500 |
| 31 pips | $500 | 1.61 lots | $500 |
| 40 pips | $500 | 1.25 lots | $500 |
Notice the pattern: the wider the block, the smaller the size, and the dollar risk never moves. That is the whole point — the chart decides the stop, the risk % decides the size. If a block needs a 60-pip stop and the sizing gives you a position so small it feels silly, skip the trade; the block is too wide for your risk budget. I run every sizing decision past my max daily drawdown calculator before the London open so the numbers are decided before the market gets loud.
I tested it: 10 order block trades, logged trade by trade
Over two weeks I traded only this plan on a $100,000 demo — H4 bias, displacement filter, 0.5% risk, minimum 2R targets. Here is the full log, nothing cherry-picked:
| # | Pair | Bias | Stop (pips) | Size (lots) | Target | Result |
|---|---|---|---|---|---|---|
| 1 | EURUSD | Bullish | 18 | 2.78 | 2R | +2.0R |
| 2 | GBPUSD | Bullish | 24 | 2.08 | 2R | -1.0R |
| 3 | EURUSD | Bearish | 16 | 3.13 | 2.5R | +2.5R |
| 4 | USDJPY | Bullish | 21 | 2.38 | 2R | +2.0R |
| 5 | EURUSD | Bullish | 29 | 1.72 | 2R | -1.0R |
| 6 | XAUUSD | Bearish | 35 | 1.43 | 2R | +2.0R |
| 7 | GBPUSD | Bearish | 19 | 2.63 | 2R | -1.0R |
| 8 | EURUSD | Bullish | 15 | 3.33 | 3R | +3.0R |
| 9 | USDCHF | Bullish | 23 | 2.17 | 2R | -1.0R |
| 10 | EURUSD | Bullish | 20 | 2.50 | 2R | +2.0R |
6 wins, 4 losses, net +4.2R — about +$2,100 at 0.5% risk on $100k, or 2.1% account growth in two weeks without touching the daily loss limit. I ran these exact numbers through the new Strategy Expectancy Calculator: 60% win rate with a 2.2R average win gives an expectancy of +0.92R per trade, and the break-even win rate for this plan is only 31%. That gap — 60% actual vs 31% needed — is the margin of safety that makes the strategy fundable.
When the order block strategy fails on funded accounts
Order blocks are not magic. Here are the four ways they cost me money, and what I changed:
| Failure mode | What it looks like | The fix |
|---|---|---|
| News displacement | NFP or CPI prints a giant candle that “qualifies” as displacement, then reverses everything | No order block trades within 30 minutes of red-folder news — the impulse is volatility, not institutional intent |
| Range-bound blocks | Price chops sideways for days, printing blocks inside the range that get pierced repeatedly | Only trade blocks formed at range edges with a liquidity pool beyond; middle-of-range blocks are skipped |
| Mitigation overshoot | Price wicks 2 pips past the block edge, stops me out, then reverses to target | The 3–5 pip buffer beyond the block edge is mandatory, not optional — my first version used the exact edge and bled |
| Against-HTF trading | Bullish M15 block inside a bearish H4 leg — looks perfect, fails anyway | Rule 1 is a veto, not a suggestion: no H4 alignment, no trade, no exceptions |
The news rule deserves emphasis because prop firm traders keep relearning it: a displacement candle printed by a news spike is not an order block. Real displacement is aggressive buying or selling into the move; news displacement is algos repricing. They look identical on the chart and behave oppositely afterward. My break of structure strategy has the same news blackout for the same reason.
My daily order block routine (the 20-minute version)
| Time (PKT) | Task | Output |
|---|---|---|
| 11:30 | Mark H4 bias on EURUSD, GBPUSD, XAUUSD | Bullish / bearish / no-trade for each |
| 11:35 | Scan for unmitigated blocks with displacement + liquidity pool | Max 2 candidate blocks, ranked |
| 11:42 | Compute stop distance and position size per candidate | Lots written down, risk verified at 0.5% |
| 11:45 | Place limit orders at block entries, stops beyond blocks | No market orders — mitigation comes to me |
| 11:50 | Walk away until London open; check kill zone timing | Entries only trigger inside 12:00–15:00 PKT window |
Two candidates maximum. The discipline of the routine is the strategy’s real edge on a funded account: order blocks are a waiting game, and waiting is the opposite of overtrading. If neither candidate triggers by the end of the London session, the day is a no-trade day and that is a good day — a flat day never breached anyone’s account.
How order blocks fit prop firm consistency and drawdown rules
The strategy’s R profile does quiet favours for the two rules that end most funded accounts. A 60% win rate at 2R+ average reward means the profit arrives in steady chunks rather than one lucky outlier day, which keeps the consistency rule satisfied without gaming it. And because the stop is structural — beyond the block — the worst case of any single trade is known before entry, so a 4-loss streak costs 2% and the daily loss limit is never in the same room as the trade. Compare that with my London breakout days, where a wide session box forces smaller size; order blocks give you the invalidation for free, built into the pattern. If you want the probability side of this, my risk of ruin calculator shows what a 60%-win-rate, 0.5%-risk plan does to your chance of blowing up: it rounds to zero.
Frequently asked questions
What is the difference between an order block and a supply/demand zone?
What timeframe works best for order blocks on prop firm accounts?
How many order block trades should I take per day?
Can I trade order blocks during news?
What win rate do I need for order blocks to be profitable?
Do order blocks work on gold and indices?
Risk disclaimer: Trading leveraged products carries a high risk of losing money. This article describes my own demo-tested routine for educational purposes — it is not financial advice. Always verify your firm’s rules before trading any strategy on a funded account.




4 comments
[…] a swing, not merely wick through it. The fair value gap entry is the same patience used in the order block guide: wait for price to come back to the gap the shift left behind, and enter there, where the stop is […]
[…] is the section the whole strategy stands on, because the site already has a full order block strategy guide, and the two ideas look alike on a chart. They are not the same trade. An order block is the last […]
[…] value gap for the entry, and a market structure shift for confirmation that the leg is real. The order block strategy on this site trades the candle where institutions last acted; the supply and demand zones guide […]
[…] below is the one I keep taped to my monitor, because mixing them up is how funded accounts die. The order block trades the body of the last candle before a displacement leg. The mitigation block is an old order […]