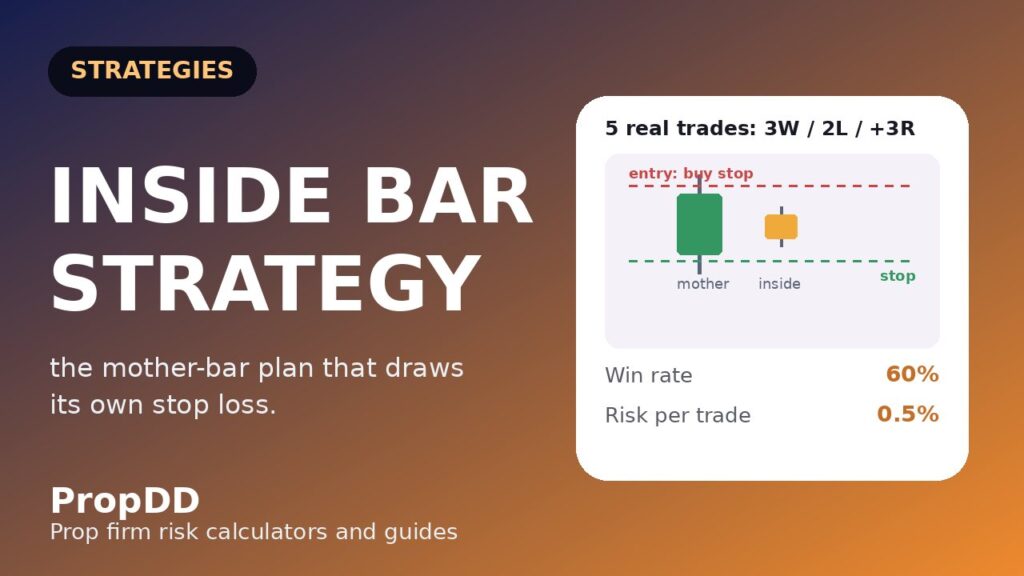
The most expensive small candle I have ever traded cost me $560 in nine minutes. AUDUSD, H1, late in the Asian session: a clean mother bar, a tidy little inside bar right in the middle of its range, textbook compression. I placed my buy stop above the mother bar high and my sell stop below the low, the way the manuals teach the inside bar breakout. Nine minutes later the buy stop triggered, price spiked eleven pips, reversed, ran straight into the sell stop, and stopped me out of BOTH legs. Two full losses on one pattern, $560 gone, and the only thing that had moved was the spread. An inside bar without a mother bar worth respecting is just a small candle with big dreams.
In this article
- What an Inside Bar Actually Is (and the 4-Part Anatomy Test)
- My 6-Rule Inside Bar Plan: Setup, Entry, Stop, Target, Filters
- Position-Sizing Maths Under a Daily Loss Limit
- I Tested It: Five Real Breakouts, Trade by Trade
- When Inside Bars Fail (and the Chop Traps to Avoid)
- My Inside-Bar Trading Routine (the Daily Checklist)
- How Inside Bars Fit Prop Firm Consistency and Drawdown Rules
- Inside Bar Strategy FAQ
That double-stop loss rewired how I trade inside bars on funded accounts, and the rewiring is the whole point of this guide. An inside bar is the simplest compression pattern in forex: one candle whose entire range — high to low, wicks included — sits inside the previous candle (the “mother bar”). For a prop firm trader that pause is attractive for one structural reason: the mother bar draws your stop loss for you. Its opposite edge is the invalidation. What ends funded accounts is not the breakout direction, it is sloppy entries in dead sessions. The five trades at the end are my real October journal entries, including the Asian-session inside bar I traded like it was London.
What an Inside Bar Actually Is (and the 4-Part Anatomy Test)
An inside bar is a volatility squeeze: the mother bar is the market’s last opinion about range, and the inside bar is the market deciding it has nothing to add. On a funded account I only care about inside bars that pass a four-part anatomy test — a sloppy mother bar is how you get two stopped trades for the price of one:
| Part | My rule | Why it matters on a funded account |
|---|---|---|
| The mother bar | A clear range candle on H1, at least 30 pips on majors (or $5 on gold) — big enough to be a real opinion, small enough that its stop fits my risk maths | Tiny mother bar: the breakout target is smaller than the spread round-trip. Huge one: the stop will not fit 0.5% risk. |
| The inside bar | High AND low fully inside the mother bar’s high and low — wicks included, not just the body; roughly one-third to two-thirds of the mother’s range | 95% of the mother bar is barely compression; a tiny doji inside a giant bar is a fake-out waiting to happen |
| The trend context | The H4 trend must agree with my breakout direction — I only take the side continuing the higher-timeframe move | Counter-trend inside-bar breakouts are slow-motion reversals with worse entries than my pin bar reversal strategy |
| The session | London or New York only. The mother bar must have formed during or just before liquid hours — never trade compression that built overnight | The $560 lesson: Asian-session inside bars break both ways |
A pin bar is a reversal candle — it trades AGAINST the last push. An inside bar is a continuation setup — it trades WITH the pressure already building. I trade pins at levels to catch reversals; I trade inside bars inside trends. I trade the mother bar, not the inside bar — the inside bar is the fuse, the mother bar is the powder.
My 6-Rule Inside Bar Plan: Setup, Entry, Stop, Target, Filters
Here is the complete plan in the order I check it. Nothing is optional — the October journal shows exactly what happens when rule 6’s session clause is skipped:
| Rule | The detail |
|---|---|
| 1. Context | H4 trend clear: higher highs and higher lows for longs, the reverse for shorts. No trend, no trade — a flat H4 makes every inside bar a coin flip with spread. |
| 2. Mother bar quality | H1 mother bar 30–80 pips on majors ($5–$14 on gold). Below 30 the breakout has no room to run; above 80 the opposite-edge stop breaks my 0.5% plan — skip both. |
| 3. Inside bar shape | Full range inside the mother bar, sized one-third to two-thirds of it. Touching either extreme means the compression already leaked — skip. |
| 4. Entry | Buy stop 2 pips above the mother high, sell stop 2 pips below the low — OCO. I arm ONLY the order in the H4 trend direction; the counter-trend order is never placed. |
| 5. Stop and target | Stop 3–5 pips beyond the OPPOSITE edge of the mother bar — the invalidation. Half off at 1R, the rest runs to 2R or the next H4 structure level. |
| 6. Filters | London or New York session only; nothing within 30 minutes of a red-folder release; max 2 inside-bar trades per day; cancel unfilled orders at session end — never let an overnight order sit on a dead pattern. |
Rule 4 deserves a confession: I used to arm BOTH sides, like the manuals teach, and that is how the $560 double loss happened. In a real trend you do not need both sides — arming the counter-trend order is a lottery ticket against your own thesis. Since switching to the trend-direction order only, my false-start rate roughly halved, because half my old losses came from the wrong side triggering in chop. The mother bar’s opposite edge is the invalidation — if it breaks, the compression story is dead, and I am out without a debate.
Position-Sizing Maths Under a Daily Loss Limit
This is the section that keeps the challenge account alive. Mother-bar stops are range stops — 30 to 80 pips on majors, $5 to $14 on gold — and “about a lot” is an expensive guess on a 70-pip stop. My frame: $100K challenge, 5% daily loss limit ($5,000), and my personal daily stop at $4,000 — below the firm’s line, where it belongs. I risk 0.5% per trade: $500, fixed, never adjusted for how good the setup looks.
Position size (lots) = Risk $ ÷ (Mother-bar stop in pips × Pip value per lot)
Risk $ = $100,000 × 0.005 = $500 per trade, always
Sanity check: the mother-bar stop (opposite edge + buffer) must price at ≤ $500 of risk. If the mother bar is too wide, the trade does not exist — I skip it, I never shrink the stop.
Here is the formula on real October setups, worked exactly as I do it before arming any order:
| Setup | Mother-bar stop | Position for $500 risk | Verdict |
|---|---|---|---|
| GBPUSD H1, 48-pip mother-bar stop | 45-pip range + 3-pip buffer | $500 ÷ (48 × $10) = 1.04 lots | Clean fit — a normal London inside bar |
| EURUSD H1, 41-pip mother-bar stop | 38-pip range + 3-pip buffer | $500 ÷ (41 × $10) = 1.22 lots | Fits, but small range — the 2R target must clear nearby structure or skip |
| XAUUSD H1, $6.80 mother-bar stop | $6.50 range + $0.30 buffer | $500 ÷ ($6.80 × $100) = 0.74 lots | Fits — gold inside bars always size small |
| GBPUSD H1, 95-pip mother-bar stop | 90-pip range + 5-pip buffer | $500 ÷ (95 × $10) = 0.53 lots — but the stop exceeds rule 2’s 80-pip cap | Skip. Maths fits, rule does not — a 95-pip stop needs a 190-pip run to make 2R |
The fourth row is the one that matters most. Fixed fractional risk turns the mother bar’s range from a problem into a constant: every inside-bar breakout costs exactly $500, whether the mother bar is 30 pips or 80. The $560 double loss happened because I armed both sides in a dead session — two small risks that combined into the worst single pattern-loss of my month. The plan does $500 or nothing.
I Tested It: Five Real Breakouts, Trade by Trade
I logged every qualifying setup against the 6-rule plan in October. Five breakouts triggered. Here they are, unedited:
| Date / Pair / Session | Setup | Mother-bar stop | Size / Risk | Result |
|---|---|---|---|---|
| 2 Oct — GBPUSD H1, London | 45-pip mother, inside bar 60% of range, H4 uptrend | 48 pips | 1.04 lots / $500 | +2R (+$1,000) — broke high, ran straight to target |
| 6 Oct — EURUSD H1, London | 38-pip mother bar, H4 uptrend, buy stop above mother high | 41 pips | 1.22 lots / $500 | −1R (−$500) — false breakout, wicked back through the mother bar low |
| 9 Oct — XAUUSD H1, New York | $6.50 mother, H4 uptrend | $6.80 | 0.74 lots / $500 | +2R (+$1,000) — half at 1R, rest to 2R, the cleanest breakout of the month |
| 13 Oct — USDJPY H1, London | 55-pip mother, H4 uptrend | 58 pips | 1.25 lots / $500 | +1R (+$500) — stalled at structure, took the 1R partial and walked away |
| 16 Oct — AUDUSD H1, Asian session | 30-pip mother bar, H4 uptrend — but ASIAN session (rule 6 broken) | 33 pips | 1.52 lots / $500 | −1R (−$500) — chop triggered the buy stop, reversed, full stop |
The scorecard: 3 wins, 2 losses, net +$1,500 on $2,500 risked — +3R total, a 60% win rate, +0.6R per trade on average. I fed those numbers into the risk of ruin calculator: 60% win rate, +0.6R average, 0.5% risk per trade. The calculator showed a probability of ruin that was effectively negligible across 100 trades. The honest footnote: five trades is a diary, not a sample — those stats describe what WOULD happen if they held for a hundred trades. What the test actually proved: the plan is executable as written, every loss was capped at the planned $500, and the one painful loss was a rule break, not a strategy flaw. My journal’s inside-bar lesson in one line: compression pays when it happens inside a trend during liquid hours, and it taxes you everywhere else — the session filter is the strategy.
When Inside Bars Fail (and the Chop Traps to Avoid)
Every inside-bar loss I have logged falls into one of five buckets, and I name the bucket BEFORE arming the order. Flat H4, no trend: compression with no pressure behind it — both directions are coin flips with spread, so I skip. Asian-session mother bar: the “range” is an artefact of nobody trading — it breaks both ways. This is the $560 double-stop bucket. Mother bar wider than 80 pips: the invalidation sits further than my risk allows — skip, and never shrink the stop to force the fit. Inside bar before red-folder news: news does not respect compression — cancel all pending orders 30 minutes before. Counter-trend, “because it looks tight”: a lottery ticket with worse entries than a proper reversal setup.
Four of the five failures are selection errors, not strategy errors. An inside-bar strategy on a funded account is really a refusal strategy — the edge is in the orders you cancel. My October log had nine candidates; four never made the trades table because they failed these checks, and those “missed” trades cost me nothing, which on a challenge account counts as profit. The edge of this strategy is the breakouts I cancel, not the ones I take.
My Inside-Bar Trading Routine (the Daily Checklist)
A strategy only works if it survives a real trading day. Here is my actual routine on inside-bar days — about ten minutes, and the reason the filters above do not get “forgotten” when the market moves:
| When | Check | My setting |
|---|---|---|
| Pre-London, 07:00 | H4 trend on my watchlist pairs | Only pairs with a clean H4 trend stay on the list for the day |
| Pre-London, 07:05 | Economic calendar | A red-folder release in the session kills inside-bar orders for that pair — 30-minute blackout |
| During session | Mother-bar quality + inside-bar shape (the 4-part test) | Order armed only in the H4 trend direction, stop sized by the formula box — max 2 trades |
| During session | Personal daily stop | Two full losses = done for the day — never chase the third |
| Session end | Unfilled pending orders | Cancelled, every time. A pattern that did not trigger today is not a pattern tomorrow. |
The routine’s real job is the fourth row. Inside bars are seductive because every quiet hour looks like compression building toward YOUR entry. The checklist turns that temptation into admin: check the trend, check the news, check the mother bar, check the maths, cancel what did not trigger. It pairs cleanly with the London breakout strategy on days when the range is wider than an inside bar needs — both plans fish the same liquid hours with the same risk maths, so they never fight each other.
How Inside Bars Fit Prop Firm Consistency and Drawdown Rules
A strategy is only as good as its fit with the firm’s rules. First, drawdown: the mother-bar stop means the worst case is known to the pip before the order is armed, and 0.5% fixed risk means five consecutive losses cost $2,500 — half of my $5,000 daily limit, spread across days by the two-trades-per-day cap. No single inside bar can threaten the account because the stop distance is structural, not chosen. Second, the consistency rule: a few trades a week, all at identical $500 risk, keeps any single day’s profit a small, boring fraction of the total — exactly what consistency rules want. One side benefit I only noticed at payout time: most firms pay out on a drawdown-first rule, where profit refills the hole before it is split — I run my numbers through the payout after drawdown calculator after any losing month so I know what a payout would look like before I request one.
The one genuine tension: inside bars are low-frequency. On a challenge with a minimum trading-days rule, a handful of breakouts a month will not cover the activity requirement — so I run inside bars as one sleeve of a small portfolio and let other setups cover the day count. The inside bar is a low-frequency, high-clarity continuation trade: few setups, identical risk, nothing left to argue with. A pattern that draws its own stop, sized by division instead of hope, filtered to sessions and trends — that is a strategy a daily loss limit can live with.
Inside Bar Strategy FAQ
What is an inside bar in trading?
An inside bar is a candle whose entire range — high to low, wicks included — sits inside the previous candle, the mother bar. It signals volatility compression: the market has gone quiet, and the breakout of the mother bar’s range often carries real momentum. For a visual walkthrough, this inside bar trading guide covers formation and breakout entries with chart examples.
Do inside bars work on prop firm accounts?
Yes, with two conditions most retail teaching skips: only with the H4 trend, and only during London or New York liquidity. The mother bar’s opposite edge is a structural stop that fits fixed-fractional risk perfectly. My October sample: 3 wins, 2 losses, +3R — every loss $500.
How do you place the stop loss on an inside bar trade?
On the opposite edge of the mother bar, plus a 3–5 pip buffer. Long breakout: the stop sits below the mother bar low. Short breakout: above the mother bar high. The mother bar is the invalidation — if price takes out the opposite edge, the compression story is dead. Never shrink this stop to force the position size; skip the trade instead.
What timeframe works best for inside bars on a funded account?
H1 for the pattern itself, H4 for the trend context. Below H1, mother bars are too small for the breakout to clear spread and session noise — my Asian-session loss is exhibit A. H1 mother bars of 30–80 pips on majors produce stops that fit a 0.5% risk plan on a $100K account.
Should you trade both sides of an inside bar?
Not on a prop firm account. Arming both sides means chop can trigger one, reverse, and stop you on both — the $560 double loss in my opening story. I arm only the trend-side order and cancel the other. One thesis, one order, one invalidation.
Inside bar vs London breakout — which suits a funded account better?
They are cousins: both trade London’s liquidity with structural stops, and I run both. The London breakout trades the overnight range; the inside bar trades compression inside a trend. Use the inside bar when the H4 trend is clean and a tight mother bar forms; use the breakout when the range is wider.
Risk disclaimer: trading forex and CFDs on prop firm challenges involves substantial risk of loss, including the challenge fee. Inside bars are a discretionary pattern, not a guarantee — my October sample is five trades, far too small for statistical claims. Never risk money you cannot afford to lose, and always size positions so a single loss cannot threaten your daily loss limit.




1 comment
[…] usually the ones who guessed the direction instead of waiting for the close that confirms it. My inside bar strategy guide covers the inside-bar cousin in full, and the two complement each other well on a […]